"Sentinel Rock" is my attempt to create a tranquil image with stark realism in a believable yet unfamiliar landscape.
Most of this scene is "hand-coded" using POV-Ray. Everything in the image was created by me specifically for this scene, with a couple of minor exceptions noted below. No third-party models or image maps were used. This is my biggest POV-Ray project ever: I wrote over 9,000 lines (equivalent of a medium-sized novel) to produce this image. No post-processing of any kind was used after rendering with POV-Ray (except conversion to JPG).
Highlights:
- Main terrains are isosurfaces combining primitive-based geometry with noisy roughness
- Several hundred different trees and bush types were generated with an include file, using randomized parameters
- Clumps of vegetation are placed on the terrain with trace() function and Gaussian distributions
- All man-made objects are POV-Ray CSG, except the boat hull, which I made in Rhino
- Nearly all textures are procedural. Some have multiple layers, slope-dependence, and height-dependent components
This project is exactly what I needed. I had been lagging behind some of the developments in POV-Ray, and it was time to catch up and explore isosurfaces, radiosity, and other features in more detail. I cranked up my processor by several hundred MHz, downloaded POV-Ray version 3.6, and went to work. What you see is the result.
Concept and Composition
--------------------------------------
Fortunately, I immediately visualized the basic concept for this image at the start of the competition, allowing me to go straight to work on the scene. I worked simultaneously on two aspects of the project: concept development, and modeling techniques. To capture the concept, I created a quick sketch in Paint Shop Pro. Over time, I refined this to bring out new details and strengthen the vision (it started to look so good that I briefly considered abandoning the competition and doing the whole image in 2D!). After developing the basic scene theme and composition to my satisfaction, I used a basic guiding principle from then on: Fix What Looks Worst. You can never go wrong using this approach. There are a few hidden surprises in this image that are only visible at higher-resolution renders.
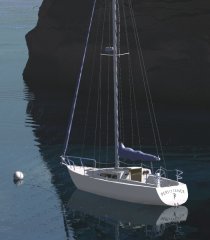
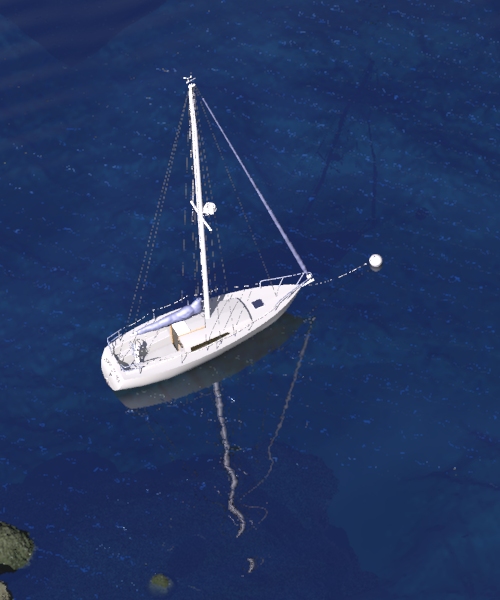
Even before the first concept sketch, I knew this would be a vertical-format image. Compositionally, the image ended up with a strong vertical symmetry, each half mirroring the other. In this context, I tried to arrange the elements to keep the composition both centered and balanced. Man-made structures on the left side contrast with the more natural elements of the right terrain. The foreground anchors the image, providing both a reference point for the viewer as well as the suggestion of a larger environment -- objects surrounding the viewer. The sailboat serves as the focal point of the scene. Although the scene has dominant large-scale elements, most of the details are rather small. The idea was to generate an image that, while pleasing at low resolutions, would really come to life in a large-format view.
Models and Geometry
--------------------------------------
My main problem here was finding a method to generate natural-looking rocky outcroppings while retaining artistic control of the shapes. Rather than rely on the randomly-generated landscapes, I wanted tighter creative control. Also, knowing I had lots of plant life and structures to add to the scene, I wanted a relatively quick-rendering landscape. My solution was to explore isosurfaces by creating an "Isolab" POV-Ray test file. I tried hundreds of isosurface function parameters. Each time I stumbled upon an interesting shape, I kept it for future reference and refinement. I found ways to seamlessly combine specific shapes. The final shape is a more-or-less "built up" terrain, using primitive shapes that are then combined and roughened. I favored using paraboloids as the main shape source because they continually widen towards the base, creating a natural look. Using what I think is an innovative technique, I created arrays for holding the unique parameters for each base geometry element in the terrain, such as the position/size/scaling of a sphere. Then I used these arrays to create both quick-rendering simple terrains as well as the detailed isosurfaces of the same shape. This allowed me to manipulate the shapes and sizes of the basic terrain blocks and see the results very quickly. Thus I did much of the scene development using simple CSG landscape structures, and only switched to slow-rendering isosurfaces for occasional full-blown renders.
The new freedom that functions and isosurfaces has given me is awesome. But one of the tricky parts in making rocky iso terrains is to increase the noise factors until just before "loose pieces" start floating in the air. (In the final terrain, I did end up with a couple of loose pieces, which were patched up with strategically placed small rocks).
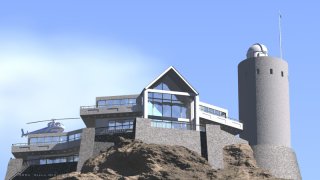
I designed the house architecture to fit this location, by blending several contemporary house designs. I wanted to achieve a feeling of solid modern luxury, with plenty of glass and a bright open look, but with a sense of history: some relationship to older structures built on the site. The house complex is detailed enough to include hanging curtains and a cleat on the flagpole to secure the rope.
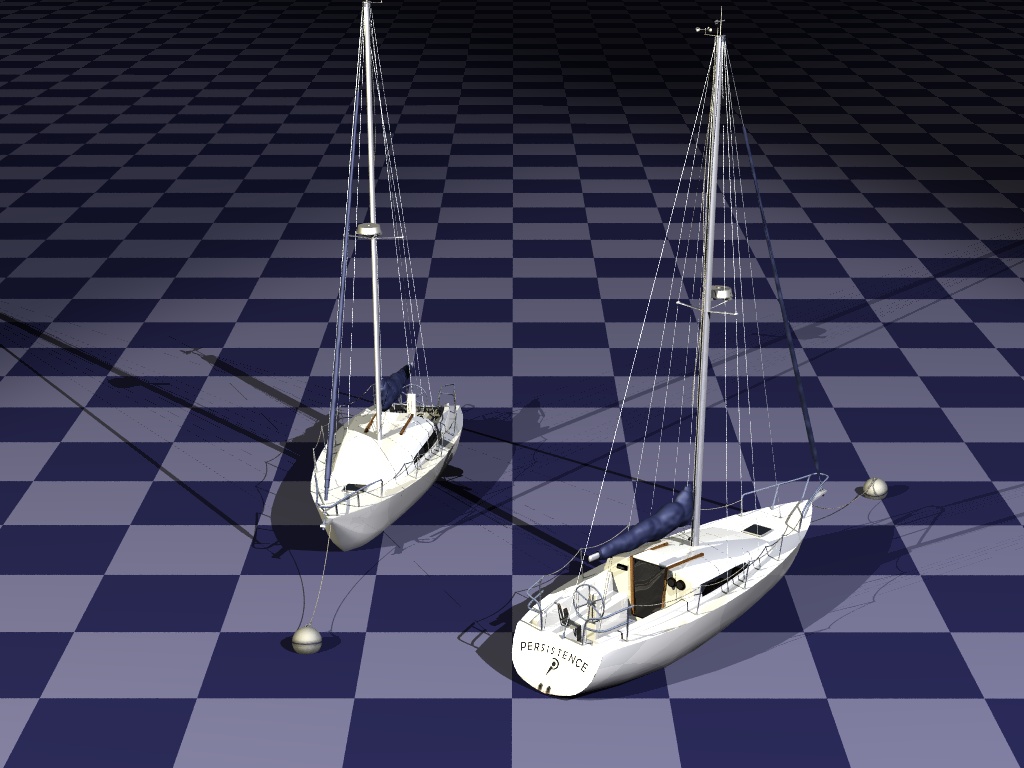
I modeled the sailboat hull and its metal railings in Rhino, an excellent NURBS modeler that exports directly to POV-Ray. To this hull shape, I added all the rest of the sailboat detail such as pulleys, gages, and lines within POV-Ray using CSG constructions. The lettering on the stern is an object pattern pigment using extruded text objects. Sometimes I become obsessed with details: I spent an inordinate amount of time perfecting the weathervane at the top of the mast!
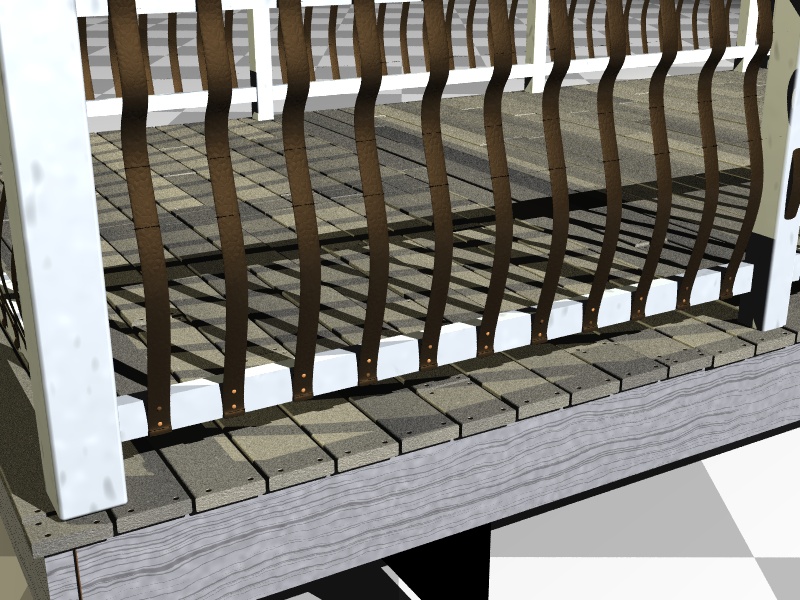
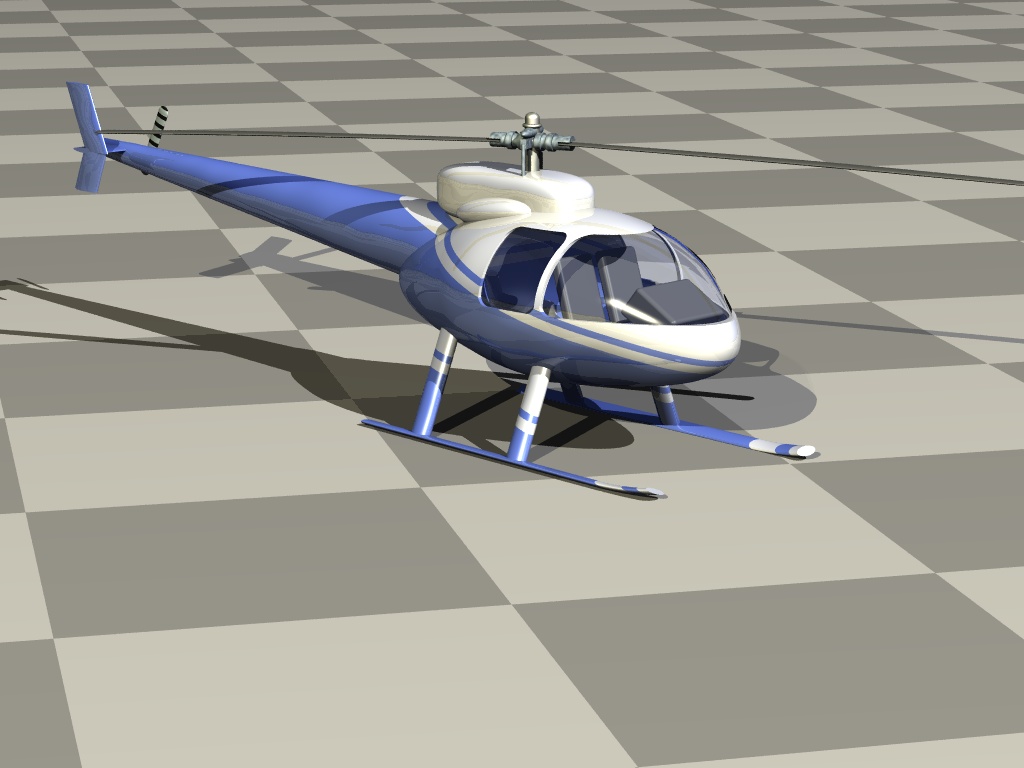
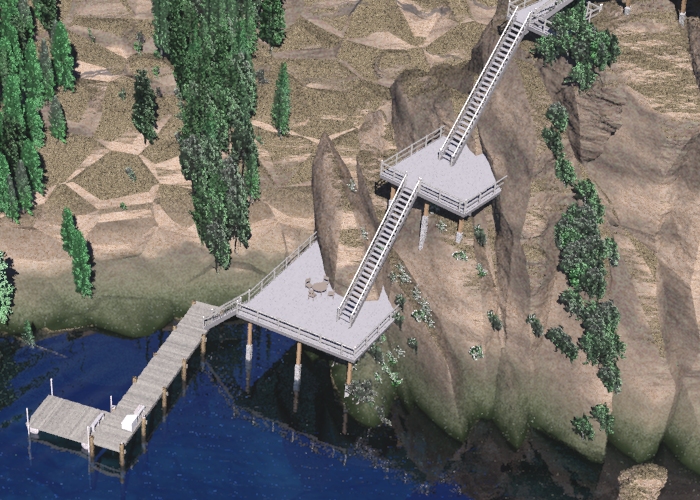
All the decks, staircases, stone walls, docks, telescope, and furniture items are pure CSG. I created a number of macros to automate some of the deck construction. The nearest decks are the most detailed, having individual planks with screws. I started the CSG helicopter, house windows, and dock macros while working on previous projects, but they are all significantly upgraded for this scene.
I generated the trees using Tom Aust's superb TomTree include file which has many tweakable parameters to create all types of blob-based trees. Most of these were rendered individually in a special scene that has the same lighting, camera viewpoint, and radiosity settings as the main scene, but creates image maps with clear backgrounds using alpha transparency. Each of these high resolution tree images is then mapped on a pair of boxes: one that faces the camera but has no_shadow, and a second copy that faces the sun. This gives me fast-rendering trees with reasonably good shadows. A few of the most critical trees are rendered in full 3D directly as part of the main scene.
I created a large variety of trees, plants, and bushes using TomTree by writing an input file that applied carefully randomized constraints to about 150 parameters, then creating an animation loop that uses this input file to generate families of several hundred related plants all at once. While I was designing the main scene on one computer, I had a second PC cranking out hundreds of tree and bush designs. Of these, I selected the best-looking varieties. The "treesource.inc" files not only created the image mapped trees, but also auto-generated individual .inc files for each tree to allow me to further hand-tweak any trees I found especially interesting. I placed most trees and bushes on the terrains using the trace() function and a formula that distributes objects in a normal (Gaussian) distribution to create realistic "clusters" of similar plants. But rather than use trace() in the final render, I created a mini-scene that used trace() to pre-calculate the locations of every bush and tree, then write these locations into an array in an .inc file, to take some of the workload out of the final render.
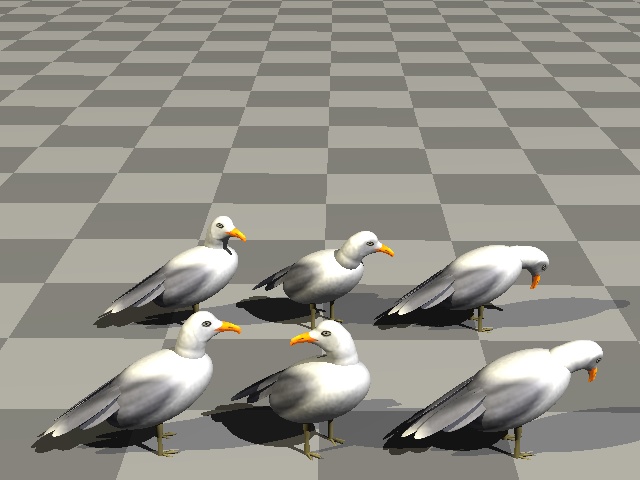
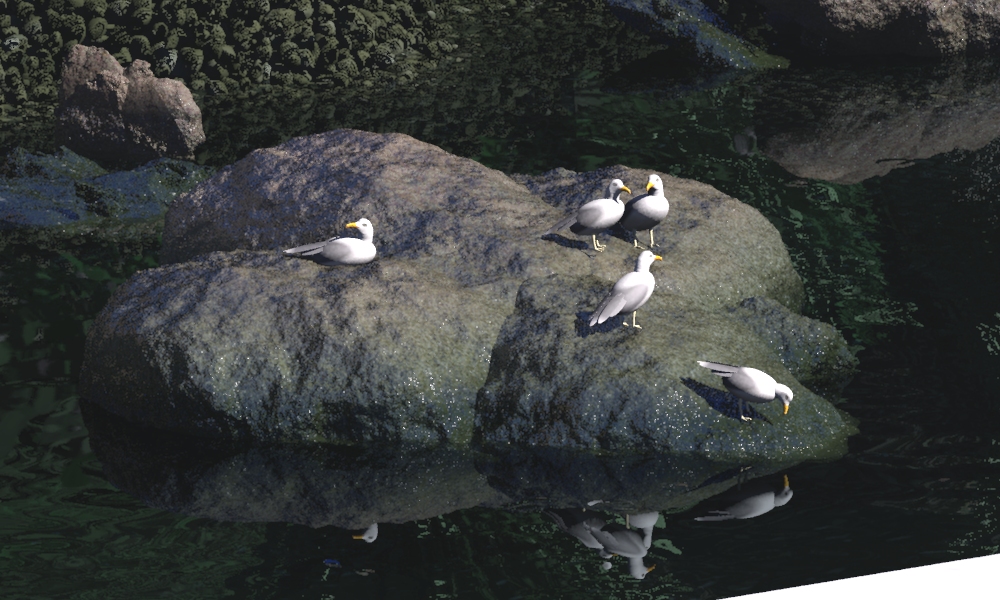
I added wildlife throughout the scene. Some are poseable CSG models; others are image maps I drew. You're on your own finding them. :-)
Colors and Texturing
--------------------------------------
Nearly all the textures throughout the scene are procedural. The sky has media-based clouds, blended with a ground fog. The terrain texture is probably the most complex procedural texture I have ever developed. It uses both height-dependent and slope-dependent components, as well as turbulent layered pigments to suggest grass, dirt, slime, moss, and grainy layered rocks. The water uses variable reflection, conserve_energy, and a fading interior. It has a fairly complex normal pattern to simulate waves in the distance and tranquil ripples in the protected cove. A heightfield with another procedural texture forms the underwater floor. Many of the man-made objects have an extra layered texture that softens the pristine finish by adding some dirt. My favorite texture in this scene is the partially wet rocks, formed by a turbulent mixture of "wet" and "dry" textures.
On a whim, I converted a test rendering of the scene into grayscale... and was stunned at the "Ansel Adams"-like realism. From that point on, I decreased the saturation of nearly every pigment in the scene, steadily boosting realism even while the color drained away. I limited the color palette to cool grays, greens, and blues to fit the environment depicted here. Very few reds or yellows are present in the image.
Lighting and Radiosity
--------------------------------------
The sun is the only light source in the scene. With radiosity and media clouds, I could not afford to add multiple light sources, or to create an area_light for the sun -- these would have killed the rendering time. The tree shadows in the foreground use a little technique I invented: the trees are the usual TomTree image maps on a plane, but I rendered them with a strong focal blur. This makes a blurred shadow that simulates the effect of an area_light for the sun, while still using only a single light source in the main scene. And it gave me the rich mottled shadows I wanted in the foreground of the image.
I experimented with many radiosity parameters, ending up with a combination that gave reasonable results in the shadow areas while not taking forever to render. I was very fortunate to discover that the best results came from a parameter combination that rendered relatively quickly.
Rendering
--------------------------------------
Because of the tiny details and speckles on many of the textures, antialiasing caused render times to skyrocket. So I limited the adaptive antialiasing to a very low depth, to prevent too many rays from spawning. This leads to a few jagged lines, but they clean up nicely at higher resolutions. A scene of this complexity requires a lot of "horsepower" to render. I took two approaches to handle this.
First, I reduced the rendering load using several techniques. For the main components of the isosurface terrains, I chose quick-rendering functions such as sphere, ellipsoid, and paraboloid. Also, the isosurfaces never add together more than three functions. There is only one light source in the scene. In some areas, I "pre-calculated" many values, to reduce the load during the render. I went to extreme measures on the trees and bushes: pre-rendering each type, then pre-declaring each image pair, then placing these throughout the scene at pre-calculated locations, all in order to reduce memory and trace times.
Second, on the hardware side, I maxed-out my PC. Just in time for the competition, I had overclocked my AthlonXP system by 450 MHz. Once, in the middle of a test render, I heard three loud beeps and the screen went black! Turns out that the CPU had exceeded its warning temperature, and shut itself down. Fortunately, I have a fan speed adjustment on my PC. I cranked up the fans to 3,000 rpm. Problem went away, but my ears complained during the rest of the project. In mid-September, I also doubled the RAM in the PC from 512MB to 1GB. The second stick of RAM enabled the system to take advantage of dual-channel (128-bit) memory mode. The increased memory bandwidth speeded up renderings significantly: about 40% improvement. Nevertheless, I needed two rendering sessions to create the final image.
For the main image --
Parse time: 1m 9s
Peak memory used: 481MB
Total render time: 47h 28m at 1800 x 1575 with radiosity and antialiasing
Resources
--------------------------------------
Hardware:
AthlonXP 2100+ overclocked 25% to 2200 MHz
1GB Corsair XMS3200 RAM
Software:
POV-Ray 3.6 for most modeling, all editing, test renders, and final rendering
Rhino 3D at http://www.rhino3d.com for sailboat hull modeling
Paint Shop Pro at http://www.jasc.com/ for previsualization, image map development, heightfields, conversion to .jpg
ColorPicker - a free utility by Jamis Buck, for quick cut-n-paste color selections in POV-Ray format
"TomTree" include files by Tom Aust at http://www.aust-manufaktur.de/austv2x.html to create custom trees and plants
Other Resources:
The Internet - for reference photos of boats, buoys, docks, houses, cliffs, vegetation, eagles, and seagulls
"Generating Spatial Distributions for Multilevel Models of Plant Communities" by Brendan Lane and Przemyslaw Prusinkiewicz http://www.graphicsinterface.org/cgi-bin/DownloadPaper?name=2002/190/paper190.pdf for ideas on distributing plants on the terrain
Special thanks to the employees of Bello Vino for giving me a splendid image of the cliffs at Split Rock Lighthouse State Park in Minnesota, and to the CCRP at http://www.californiacoastline.org/ for posting spectacular high-resolution images of the California coastline.
|


